WP Contacts has extensive capabilities provided in a simple user friendly interface. Many of the controls are drag and drop interfaces which you can even manage on small devices. WP Contacts allows you the ability to customize the name of every field and the purpose of most of them (except for a few built-in fields).
You also have the ability to create as many extra fields as you need and set up the filtering capabilities (Sources, Types & Status) to be any name you want, along with any number of options with those. You will be able to decide which fields display on the main page and what order, and you can also set the order of the fields for the individual view seperately. In the end, you have an extremely powerful tool to manage your contacts, leads, or just about anything else you want.
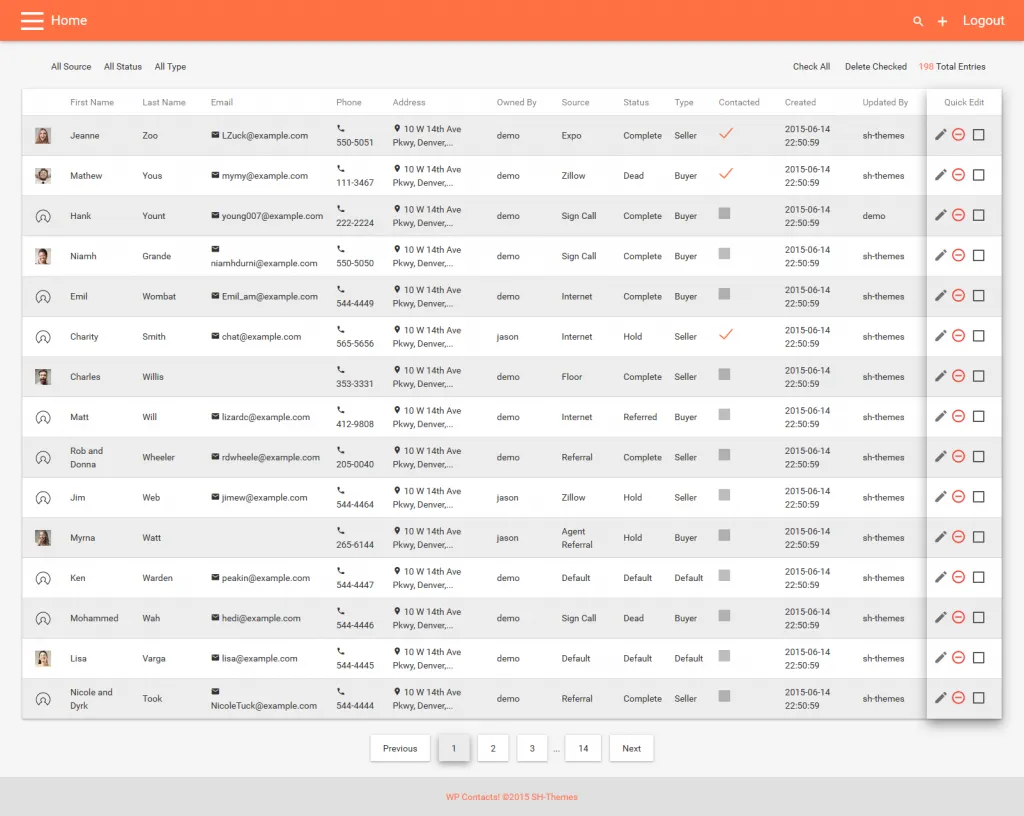
From the Home Page view, you will have the capability to sort, filter, search, add, edit, delete and paginate through all leads with a view that shows whatever fields you decide to show in this view. If you have many fields displayed here, you will be able to scroll to the left and right.
On small screens the layout will change to a vertical implementation. You can also enable the quick edit menu to be ‘sticky’ where it will always stay on screen with the backend option Fixed Edit Column set to True. This is useful when you want many fields displayed on the main page and is shown in the image above.
We have also added a quick method to delete multiple entries using the Check All and Delete Checked at the top right of the page.
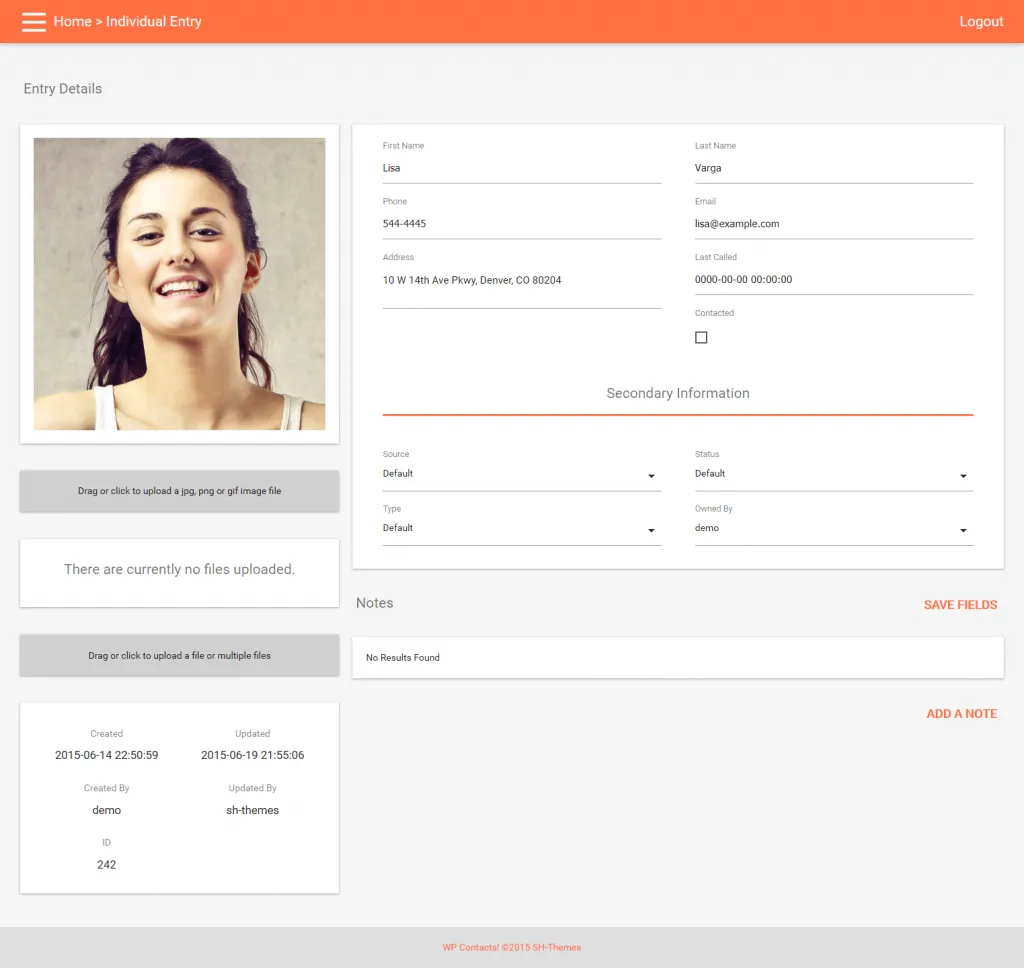
The Individual Entry page is available when you click on any of the fields for a particular contact on the Main page. This view will show the contact image (if using this feature), all fields in the order you’ve set under the Manage Fields section, any files associated with this contact, and notes associated with this contact.
From this view you will be able to modify the contacts image, manage files, manage the field data, and add, edit or remove notes. This view would be considered the complete contact view of all information that applies to the contact.
Contact images, files and notes will apply changes immediately when you submit them; whereas field edits will be applied after you click save for them.
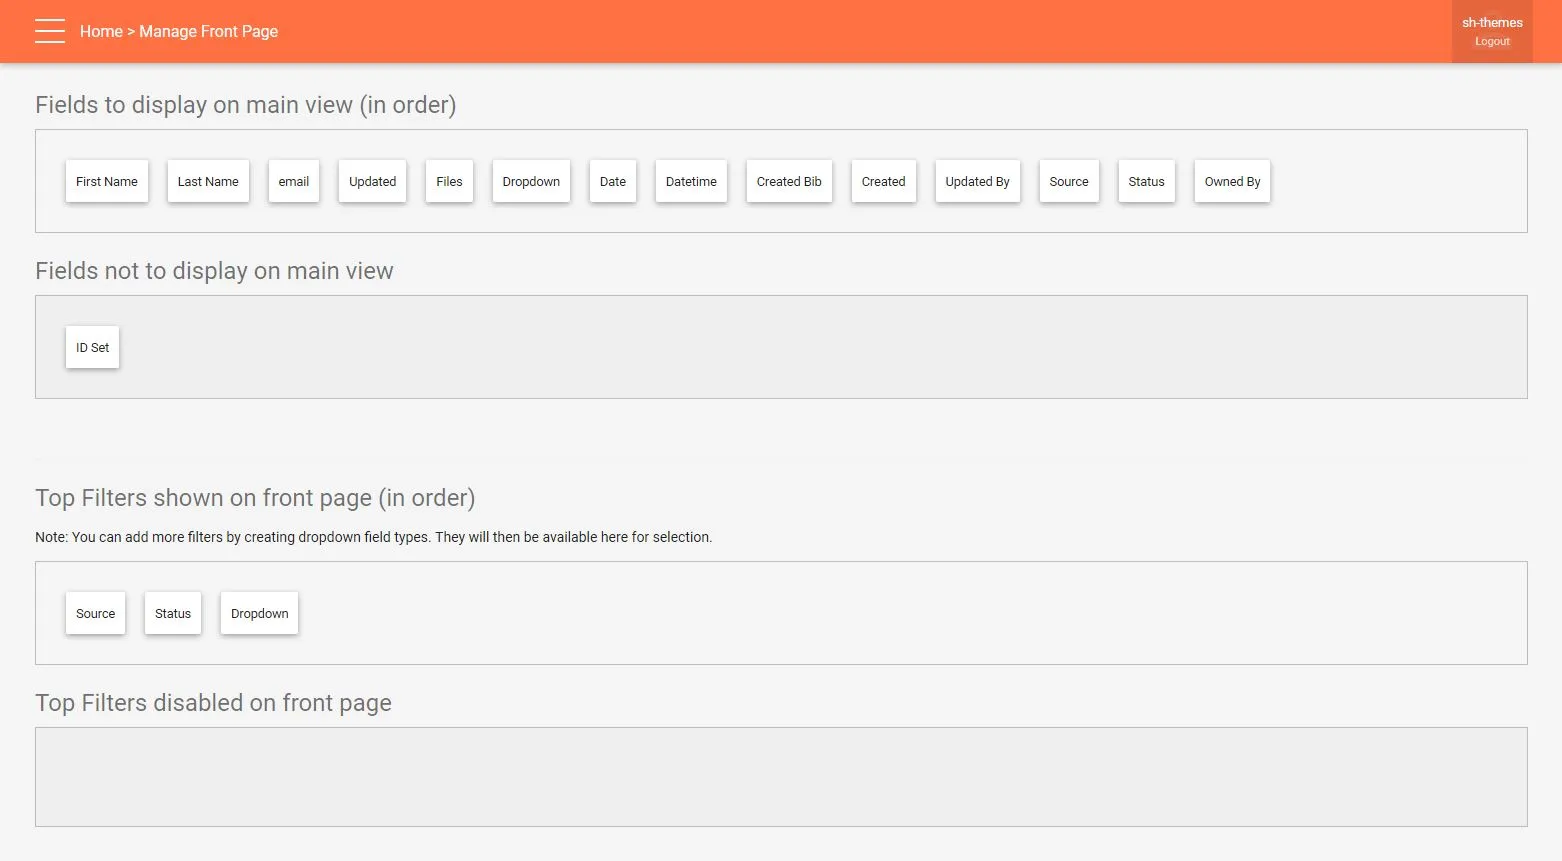
The Front Page Management area allows you to decide which fields will be displayed on the Front Page (Main page) and in what order for all of your contacts. In this section you can drag and drop the fields in the order you want them displayed and move the fields you do not wish to display into the Fields Not To Display area.
You can also set the filters that are used on the Front Page as well here. Filters let you drill down to specific views based on which filters are selected.
Changes made here are instantaneously saved when you make a change.
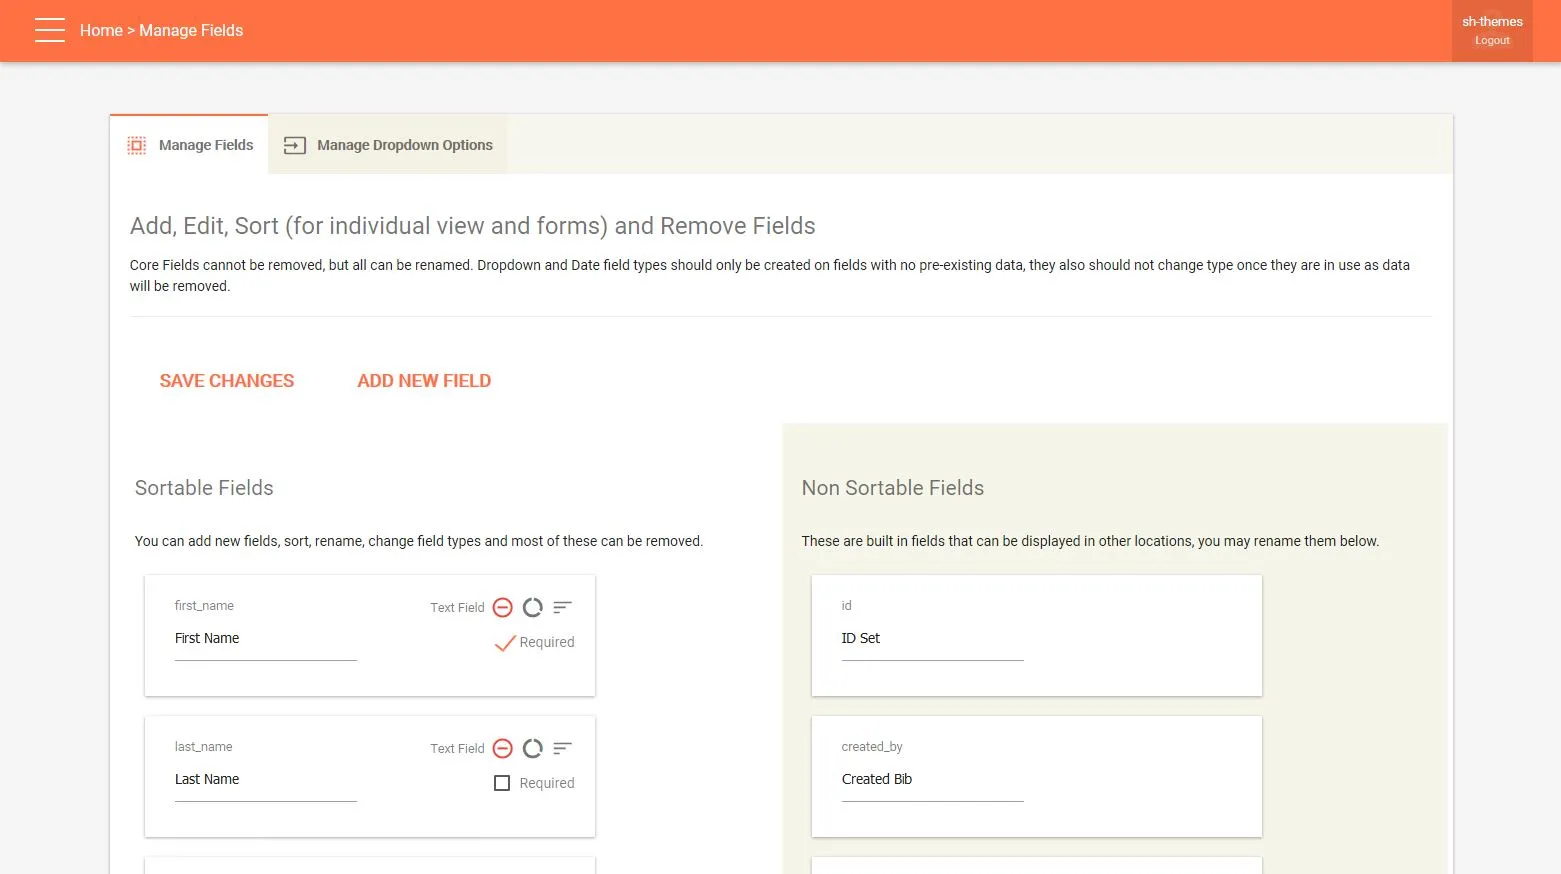
The Manage Fields Area lets a user will full access add and remove fields to use in WP Contacts. There are several fields that cannot be removed which are referred to as Core Fields. These fields are needed by the system to track different information and will not have the remove capability. All of the fields can be renamed to any name of your choosing. You can sort the fields in any order you wish which will control the order of display on the individual contact page.
The fields here will have a small reference name (as seen above) which actually refers to the database column name. This is no more than a unique identifier for the field and is not displayed within the other parts of the interface. Once you’ve adjusted the fields to your own needs be sure to save them as no changes will take effect until you do so.
You can also set fields you create to be required for input, forcing anyone adding an entry to input something for those fields.

Different fields will have different requirements, here is an explanation for those…
- Date Fields – Will verify a date has been entered
- Email Address – Will check the format to validate an email address
- Text Field / Text Area / Map Address / Phone Number – Validates that input has been given
- Checkbox / Rating / Group Title – Do not use required input capability
When you add a field on this screen. It will by default be added to the Fields Not To Display section of the Front Page Sorting. So if you would like it to display on the front page, you’ll need to set it there.
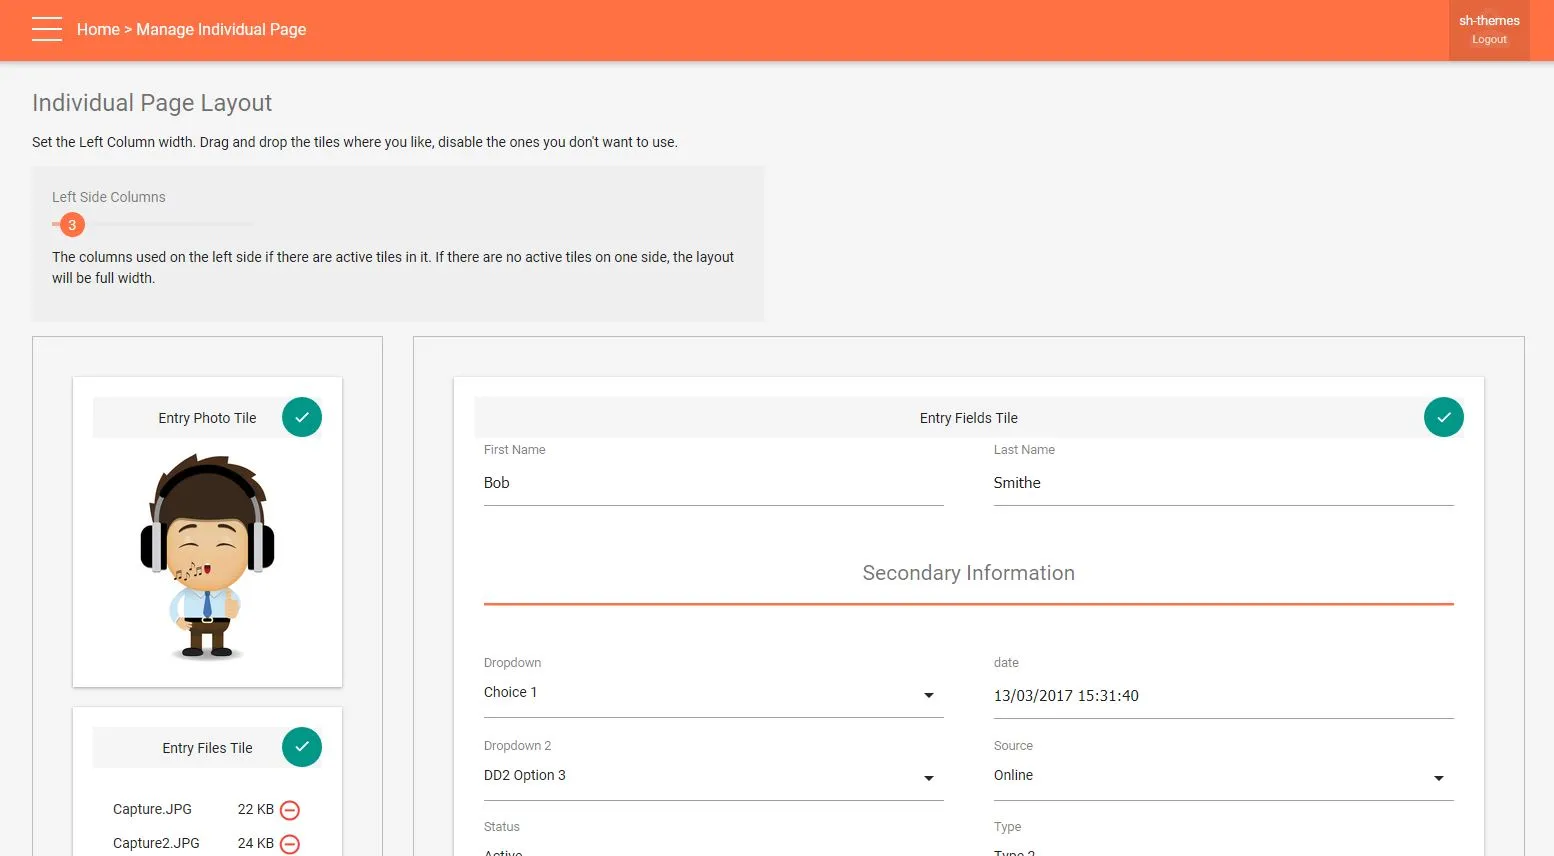
The Manage Individual Page lets you change the layout of the Individual page view. You can re-organize by dragging and dropping sections to where you want them and change the left side columns width. Each section can be enabled or disabled here by selecting to disable it. If there are no active tiles on one side of the layout, the layout will be full width.
Changes are saved instantaneously on this page.
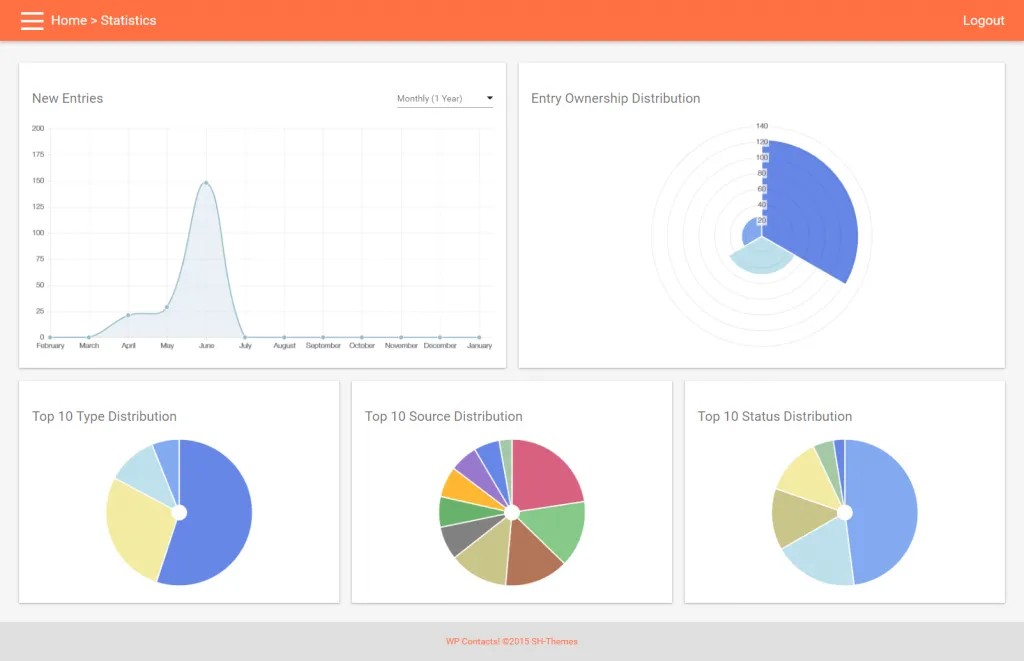
The statistics page is available to all users that manage entries (full access and manage own leads). Users who manage their own leads will see statistics for their own entries only while full access users will see results for everything. This page will give you summary information about your entries in currently 5 graphs (we may add more depending on what is requested). These graphs will show new entries daily, weekly and monthly, Ownership count, and top 10 category count for each filter. These graphs are dynamic (real time) and based upon counts that are currently in the database.
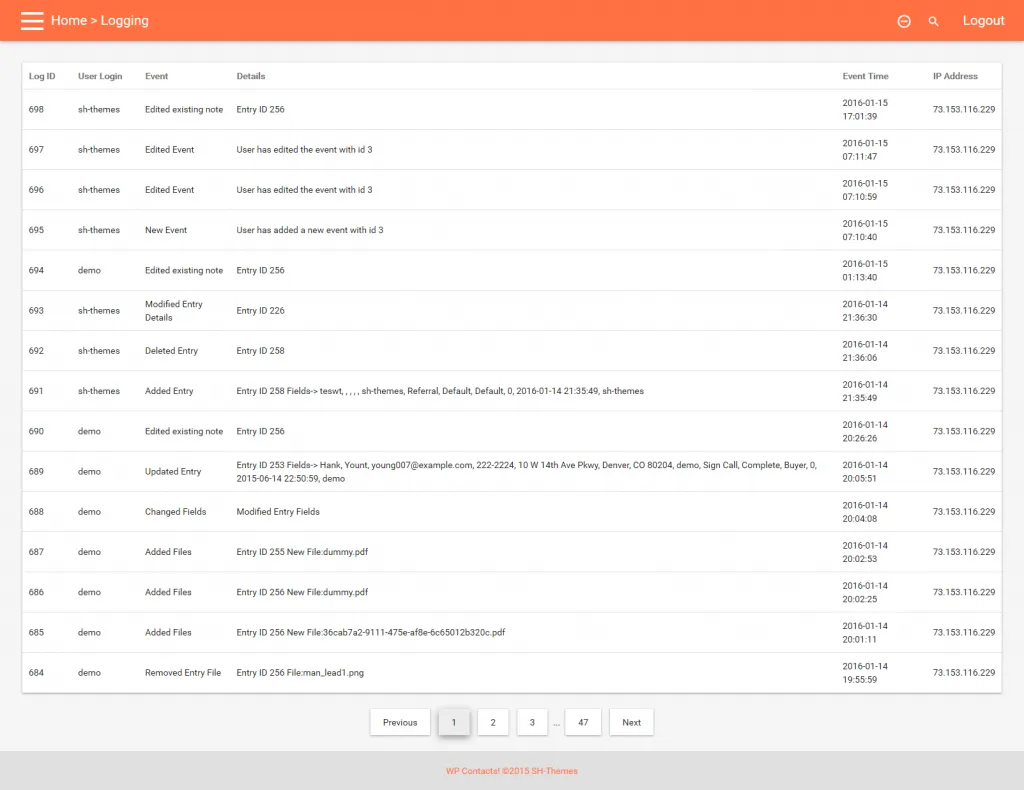
The logging capabilities of WP Contacts is a powerful feature. Everything someone edits or changes is logged with very detailed information. You will know Who made a change, when it was done, where they came from and what they did. This is good in cases where you have several users working in a system and will allow you to know where changes have been made.
The logging page like the Front / Main page view of contacts will be paginated based on your settings set in the backend. Much like the front page, you will also be able to sort the data and search for specific information that is set in any of the columns. This page is only available to users with Full Access. If your logging entries get too numerous for you, you can remove all logging events with the minus sign in the top right of the screen (of course that event will be retained).
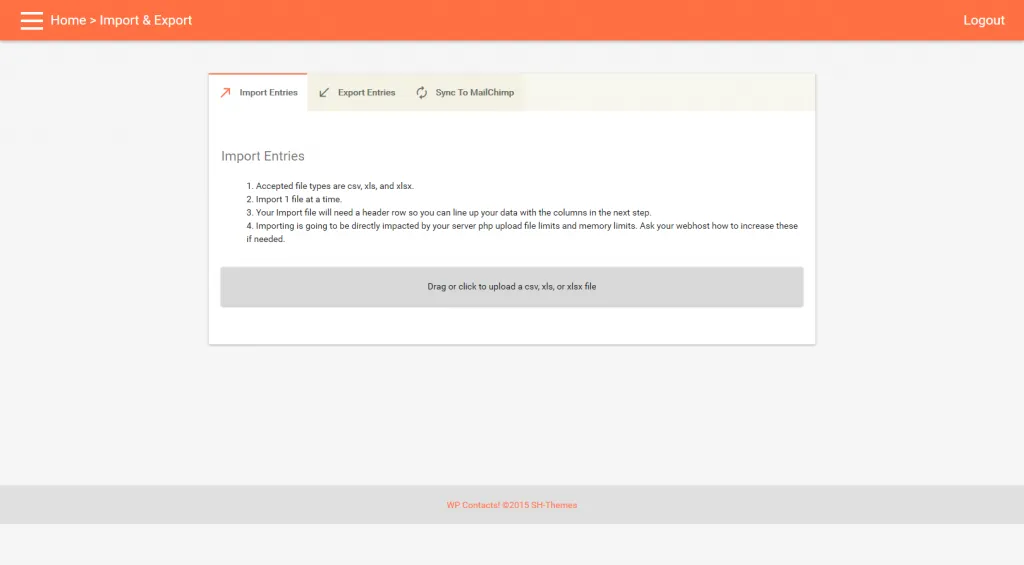
Importing and Exporting are yet another powerful feature of WP Contacts. We have included a pretty slick interface to allow you to move information in and out of WP Contacts. Lets say you have a few hundred leads you want to import into the system, all you will have to do is upload a CSV, XLS, or XLSX file (with a top title row) and match up the fields from your sheet to what you have set up in WP Contacts. Even the filtering fields (Sources, Types & Status) will add new options based on what you have set in your file.
Starting with version 3.1.9, we have the capability included for you to update existing entries with an upload. You will need an ID column in order for the import to match entries. Keep in mind a spreadsheet needs to have either updates or new entries but is not meant to contain both – so be sure to limit a spreadsheet to either create new entries or to update ones that already exist.
This tool is available to all Full Access and Manage Own permission groups set in the backend of WP Contacts. When uploading contacts, all contacts will by default be assigned to whoever does the upload for ownership. If you have a sheet of data to import and want it assigned to different individuals, just have each of them upload the data you want assigned to them.
When exporting you will be able to select the data columns you want to receive in your export file. Let’s say for example you just need email addresses for the contacts in your installation in order to load into an email campaign tool. You will be able to select just that field for doing your export.
Users that only manage their own contacts will only be able to export their own contacts and users that have full access can export all contact information.
We have included a Sync to MailChimp option. This is an awesome feature that lets you input your MailChimp API key, choose a list and map the fields to update one of your MailChimp lists with new emails and contacts. MailChimp will filter duplicates so you don’t have to worry about duplicating entries to your list. When the sync is finished, you will get a summary of the entries that were added to the list!
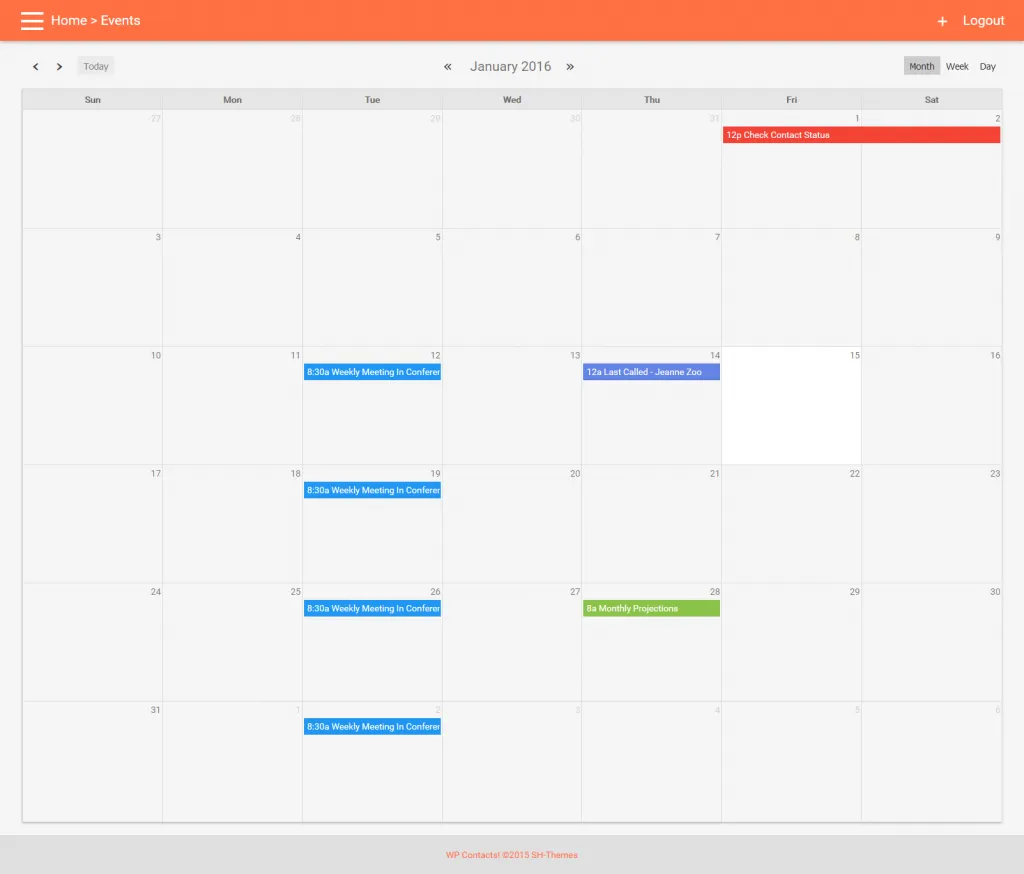
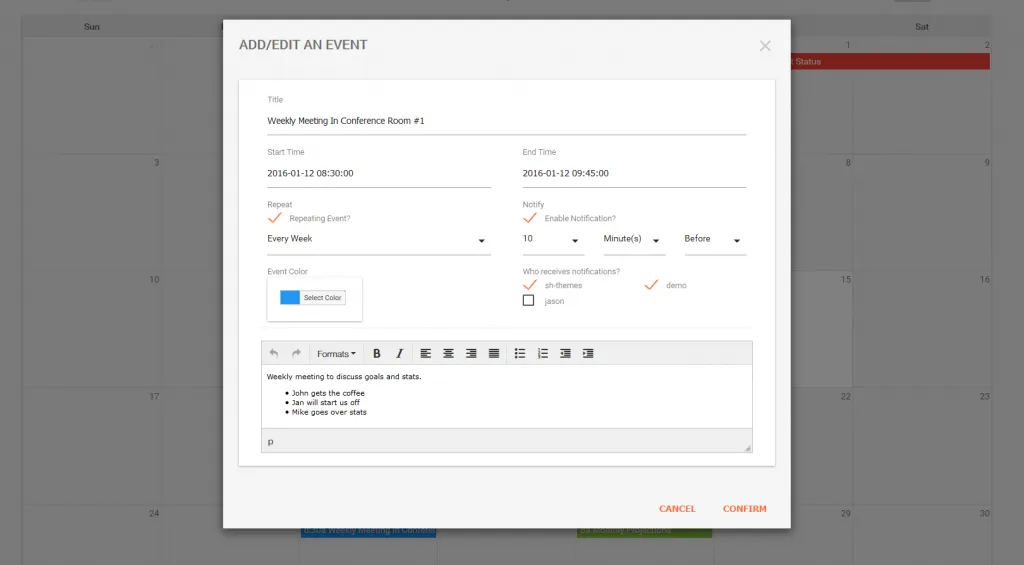
You can enable and disable Events in your WP Contacts backend settings along with a few other options of what is displayed and notifications. The events calendar can include new entries and any Date Time fields you create in your contact system (if you enable these) on the calendar. You can also add, edit and delete events – give them titles, descriptions, set the color, make them reoccurring events and enable notifications before or after the event at a specific time. You can also choose who receives the notifications.
If you want to use notifications, you’ll need to make sure your server is configured correctly to deliver mail. Below is a screenshot of editing an event:
