The WP Amortization Calculator has many options for customizing the appearance and the operation of how you are going to work with the tool. Technically you can just save options on the Calculator Global Settings and Report & Email Settings tabs and have a functional calculator but you’ll probably want to change a few things.
Table of Contents
Open Table of Contents
Intro
The first thing to do is go to the WP Amortization Calculator tab on the left side of your WordPress Admin bar which is shown below:
There are many options with the WP Amortization Calculator that will let you customize it to meet your needs.
There are currently 3 tabs within the WP Amortization Calculator settings, the first tab will have most of the settings for this tool, the second tab will have the generated report, email and PDF settings for customization.
If you uninstall the WP Amortization Calculator and then re-install it, all of your settings will be reset to default. You may wish to do this in order to start over with the original default settings in case you want them again.
All Calculator settings will have pre-filled default values for you that you can certainly use as is however, you are free to change any field you wish.
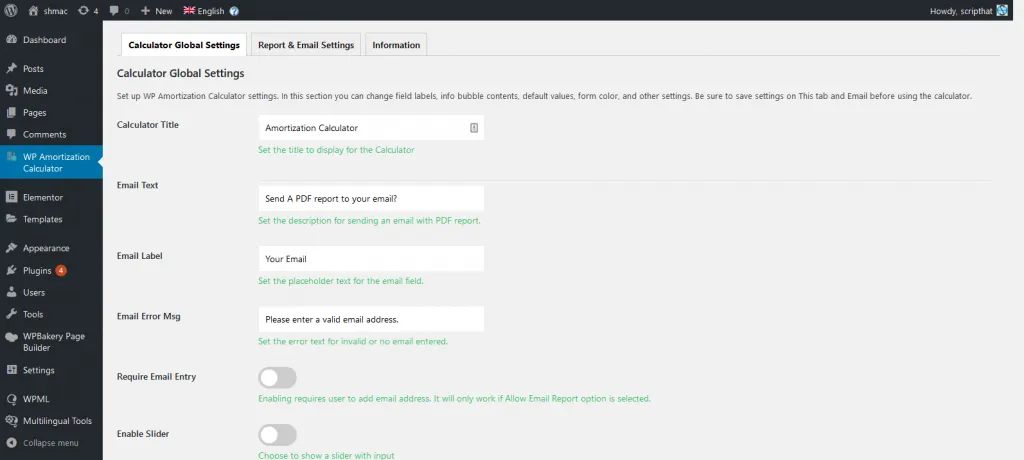
The Calculator Settings tab has several options that we will go over below:
The Calculator Settings tab starts with choosing a Calculator Title. This will set the title of the calculator displayed on the front-end form for visitors noted below in the image as ‘Amortization Calculator’.
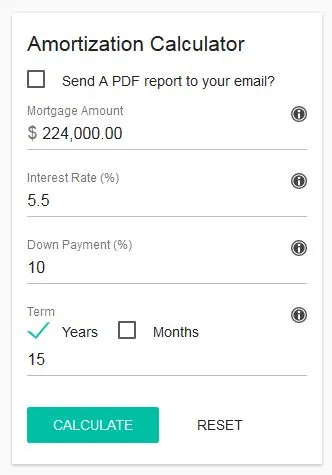
Email Text – If you choose to enable email reports for customers (located on the Report & Email Settings Tab), this is the text shown in the image above stated as Send a PDF report to your email?
Email Label – This is the label that you will choose for the email field (displayed when the top check mark is checked).
Email Error Msg – Error message when email field is empty or not an email address for the input.
Require Email Entry – Forces users to enter an email in order to generate the report.
Amount Label– Default value of ‘Mortgage Amount’ can be changed to what ever text you would like.
Amount Info Bubble – The help bubble displayed when hovering over the information icon. This can be set to any text you would like.
Default Purchase Price – The default purchase price for your visitors. Set the amount you would like for this field to initially display.
Interest Label – The interest field label text you would like to use.
Interest Info Bubble – This is the help text displayed when someone hovers over the information icon for the interest field, set to what you would like.
Default Interest Rate (percent) – The default interest rate you would like the form to use initially (e.g. 5.5).
Down Payment Label – The label for the default payment percent field that you would like to use.
Down Payment Info Bubble – The help text when a visitor hovers over the information icon for the down payment field.
Default Down Payment (Percent) – The default down payment percent you would like pre-filled for visitors.
Loan Term Label – The label text to use for the term of the loan field.
Loan Term Info Bubble – The help text displayed when the information icon for the term field is hovered over.
Default Loan Term (Years) – Set the default value for your visitors for the loan term in years on this field.
Enable Insurance Cost Estimate – Set to enable or disable Insurance costs to be included in the calculator results.
Monthly Insurance Cost Estimate – If enabled on the previous setting, the monthly amount for insurance you would like to set for your visitors.
Enable PMI Cost Estimate – Set to enable or disable the mortgage loan PMI cost estimate to be included in the calculator results.
Monthly PMI Cost Estimate – If enabled on the previous setting, the monthly cost estimate for PMI per 100,000 dollars.
Enable Tax Cost Estimate – Set to enable or disable tax estimate in the calculator results.
Taxes Per 1000 Assessed – If enabled above, this is the tax rate per 1000 dollars of the assessed value of the property.
Disclaimer Notice – This is the disclaimer text displayed at the bottom of the amortization schedule results, set it to anything you would like.
Currency Symbol – Insert your currency symbol to be used in all calculations and fields that display the symbol.
Currency Format – There are 5 different formats available for currency formats covering the majority of world currency depiction…
- Standard Format – 100,000.00
- Switched Format – 100.000,00
- Spaces and Comma Format – 100 00,00
- Indian Rupee (e.g. 10,00,00,000.00)
- Swiss (e.g. 10’345’567.00)
If there are other formats that you use, feel free to request it in our support area.
Currency Symbol Side – Choose to have the currency symbol on the left or right of the input.
Primary Color – The primary color used in the form and the results displayed.
Custom CSS – We’ve included the capability for you to add your own custom css to WP Amortization Calculator. If you are familiar with CSS, you can override many styling elements of the calculator and by doing it this way, any automatic updates will preserve your custom CSS code set here.
Custom JS – We’ve included a section for you to add your own Javascript for things like preloading the Amount from another place on page for example. You can add any custom javascript here.
To get you started here are a couple of the common classes used in the WP Amortization Calculator listed below…
- shmac-holder – This is the form container div that holds all of the form fields in the calculator.
- shmac-div – This is the modal popup window container div that holds all of the elements displayed in it.
In the WP Amortization Calculator version 1.1.8 and above, we have added a slider option.
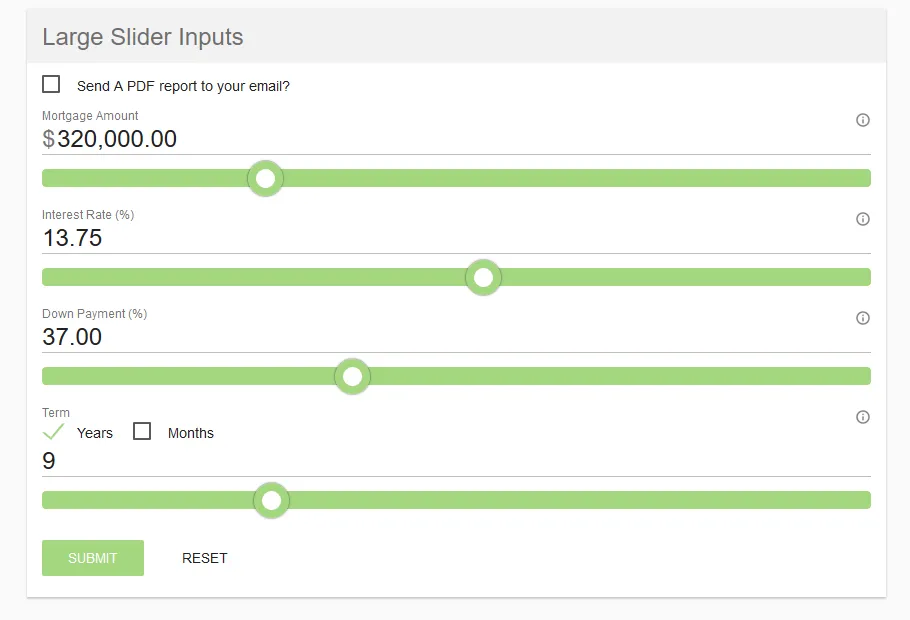
By default the slider is disabled after installation. But you can enable it from the settings. If its turned off then the slider will not be shown on the frontend.
There is also an Enable Input Readonly. It is for changing inputs to readonly mode. If it’s selected Yes, then Users can only provide values by the slider for slider enabled fields.
Global Calculator Settings
The Calculator Settings tab has several new options and we will add to these as needed. Below are some of the primary settings available:
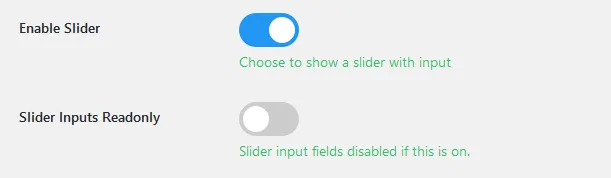
Enable Slider – It’s for enabling sliders in frontend.
Enable Input Readonly – If slider is enabled, then this option will work. To changing inputs only by sliders and they will be in readonly mode.
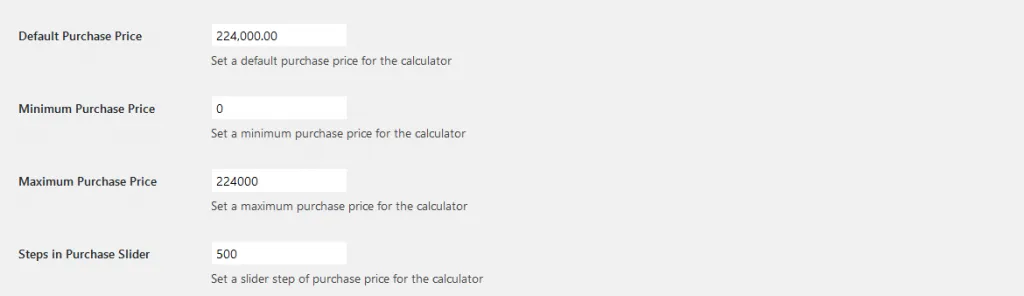
Minimum Purchase Price – The minimum Amount that user can input.
Maximum Purchase Price – The maximum Amount that user can input.
Steps in Purchase Slider – It is also depending on whether the slider is enabled or not. Amount Slider will be increment by this value.
Minimum Interest Rate – The minimum interest rate that user can input.
Maximum Interest Rate – The maximum interest ratethat user can input.
Steps in Interest Rate – It is also depending on whether the slider is enabled or not. Interest Rate Slider will be increment by this value.
Minimum Down Payment – The minimum down payment that user can input.
Maximum Down Payment – The maximum down payment that user can input.
Steps in Down Payment – It is also depending on whether the slider is enabled or not. Down payment Slider will be increment by this value.
Minimum Term – The minimum Term that user can input.
Maximum Term – The maximum Term that user can input.
Steps in Term – It is also depending on whether the slider is enabled or not. Term Slider will be increment by this value.
Here is an example of the Amount Slider settings:
Slider Bar will have the default primary color that you selected in settings.
Email & PDF Settings Tab
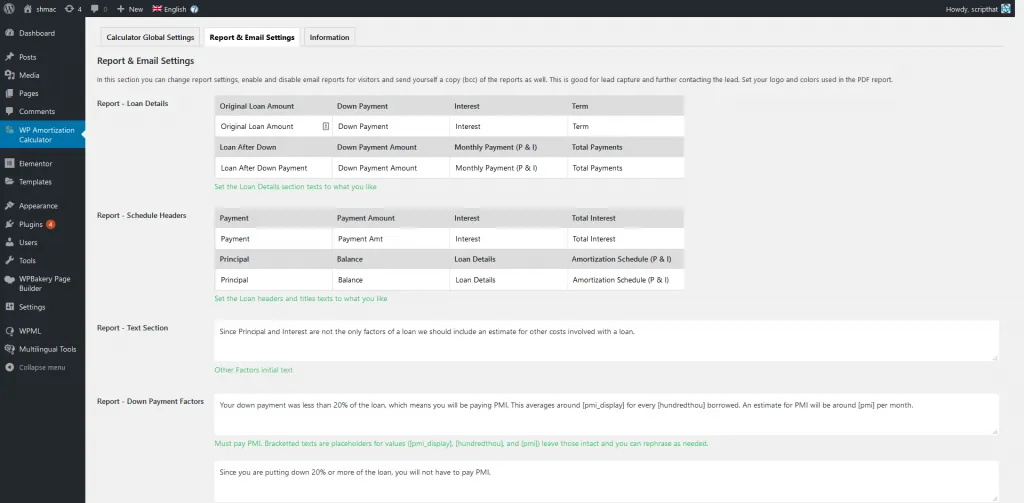
This tab allows for customizations and settings for the generated report, email and PDF results. You can change all text to what you like in the generated report (and PDF on this tab). Some settings will determine if the fields are shown when chosen on the Calculator Global Settings tab (like Down payment being enabled or not).
Allow Email Report – This setting will enable or disable all email functionality, so if you don’t want to allow visitors to receive a report you can disable it here.
BCC Email Address – This is the email you want a hidden copy to go to when a visitor requests a PDF email. Whatever email you set here will receive the same result set that the visitor chose. Very handy for tracking the lead and knowing exactly what kind of loan they are interested in.
From Email Address – This is the email address that will be displayed in the from field in the email to the visitor. Make sure you use an email address that your hosting will allow you to set the from field to.
Custom Email Subject – The subject of the email message sent to the visitor. Keep it at a reasonable subject message length.
Custom Email Text – You can add your own custom email message text in this field to personalize the message received, be sure to add your contact info to so visitors can reach you!
Primary PDF Color – This is the primary color used in the pdf result sent with the email, the default for this is set to green.
PDF Logo or Header Image – Upload an image in jpeg or png format that will go at the top of the PDF sent to visitors. Be sure to use a reasonably sized so it will fit well in the PDF and won’t make your email message too large. For reference, the image used in our demo is 8kb and is 410px x 127px and it’s recommended to use something similar in size.
PDF Header Large Text – This is the text that goes at the top of the PDF report received (underneath your logo image if you use one)
Be sure to save settings on both tabs before using the shortcode or the widget so that the calculator will have all of it’s settings in place
Shortcode and Widget Usage
After you’ve set up and saved your settings, you will be able to use the shortcode, Visual Composer, Elementor or the widget (or all!) on your site.
To use the shortcode, you can insert the WP Amortization Calculator shortcode in any shortcode aware textarea of your theme. Just paste the shortcode [shmac_calc_sc] in a page or post to have it display. If wanted, you can add an extra class of your choosing to the specific calculator for styling with an extra shortcode option e.g. [shmac_calc_sc extraclass=”yourclass”], widgets have the option as well. You can override any of the settings on a particular calculator by setting the field=”value” for the calculator. This is mostly useful if you have multiple calculators with different uses on a site.
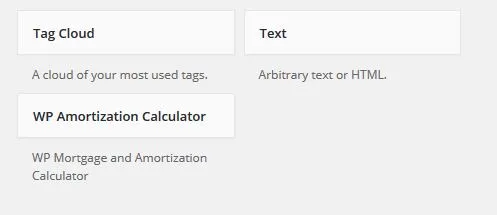
To use the widget, after you’ve installed the plugin you will have the following widget under Appearance -> Widgets:
Just drag it into the sidebar you would like and set an optional title and optional overrides to the calculator.